How to create an organization
If you have a Proton for Business plan or legacy Proton Visionary plan, you can enable multi-user support and create an organization:
- Our Proton for Business plans are priced per user. You can add up to 5,000 users, who you can then add to your organization. If you wish to add more than 5,000 users, please contact enterprise@proton.me to discuss your needs.
- If you have a Proton Visionary plan, you can include up to six total users in your organization, including yours.
Note that once you’ve created an organization, you can’t delete it.
How to create an organization with a Proton for Business plan
How to create an organization with a Proton Visionary plan
How to create an organization with a Proton for Business plan
If you have a Proton for Business plan, you can create an organization with a custom domain (e.g., @yourdomain.com). Then you can create new Proton user accounts, like name@yourdomain.com.
To create an organization with any Proton for Business plan, you must:
1. Add at least one additional user to your Proton for Business plan.
Learn how to add users and addresses to your plan
2. Connect a custom domain to your account.
Learn more about how to connect a custom domain
3. Enable multi-user support: Log in to your Proton Account at account.proton.me and go to Settings → All settings → Organization → Multi-user support, and click Enable multi-user support.
This enables multiple users to have email addresses using your custom domain.
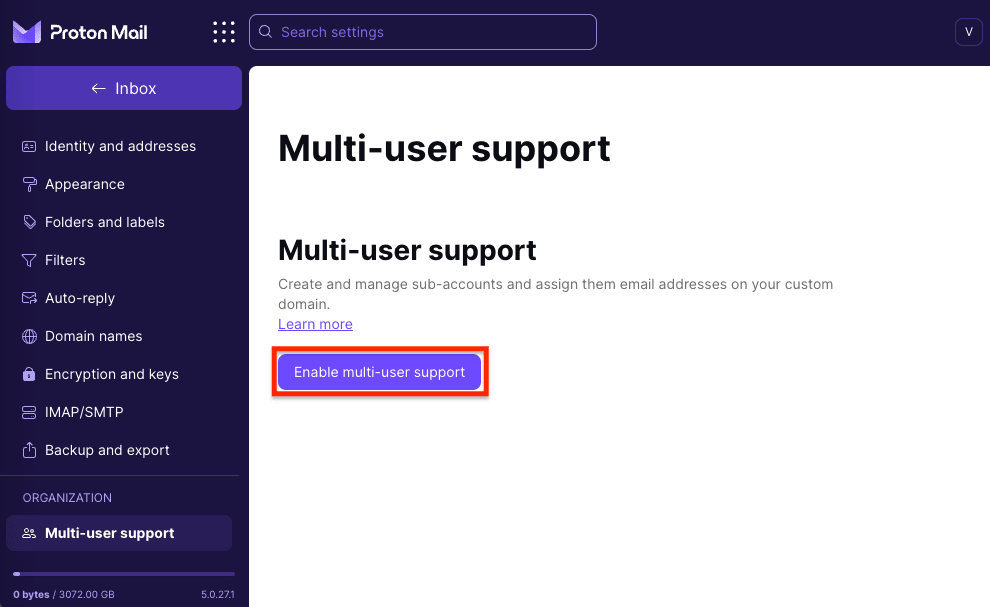
4. Enter your password and click Authenticate to confirm.
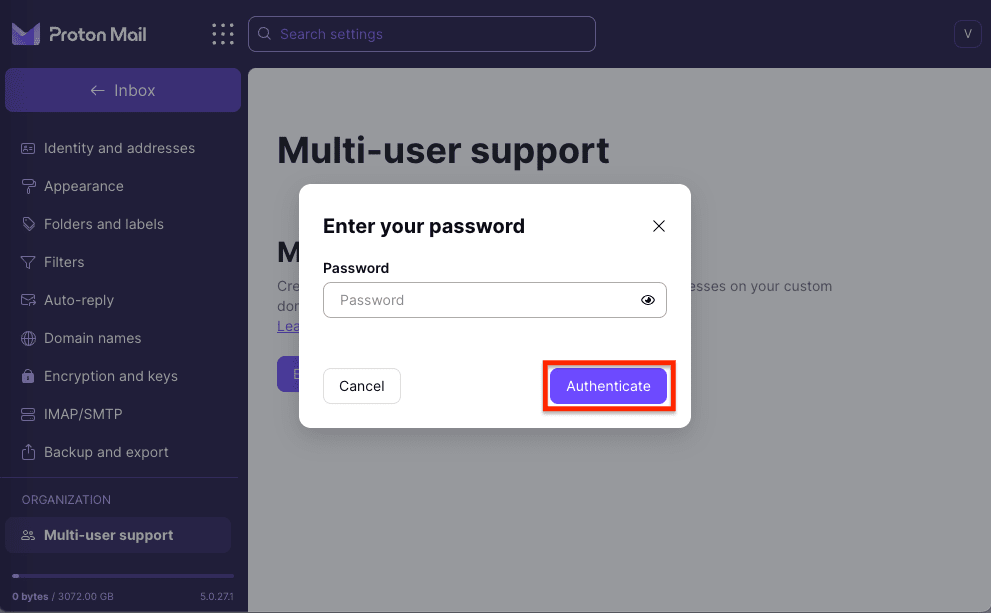
5. Pick a name for your organization, which will be visible to the people you add to your organization. Click Submit.
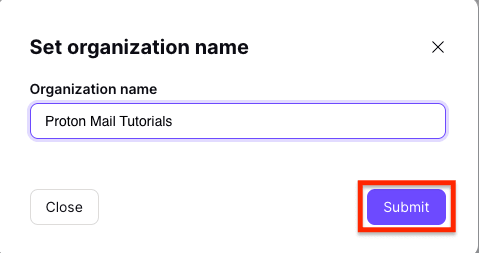
6. Allocate storage space to your administrator account. The amount of storage space you have available is determined by your plan.
Learn more about increasing your storage space
You can allocate your storage space among your organization’s users later. For now, you’re allocating storage space only for the administrator account. This storage will be used for the administrator’s email contents and for files stored on Proton Drive. Click Submit when you’re done.
Your organization is now activated. You should now see its name when you go to Organization → Organization and keys in your Proton Account Settings.
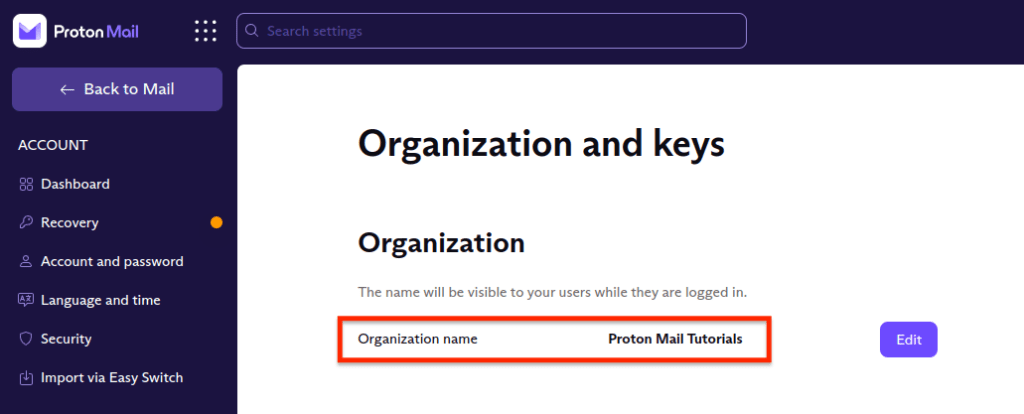
The next step is to add new users to your Proton organization.
How to create an organization with a Proton Visionary plan
If you have a Proton Visionary plan, you can enable multi-user support and create an organization with up to six users. Once you’ve created your organization, you can invite existing Proton users to join or create new Proton user accounts if you have a custom domain.
To create an organization with a Proton Visionary plan:
1. Log in to your Proton Account at account.proton.me.
2. Go to Settings → All settings → Organization → Multi-user support and click Enable multi-user support.

3. Enter your password and click Authenticate to confirm.

(Note: Unlike Proton for Business plans, with Proton Visionary, you don’t need to add a user to your plan and set up a custom domain to enable multi-user support.)
4. Pick a name for your organization, which will be visible to the people you add to your organization. Click Submit.

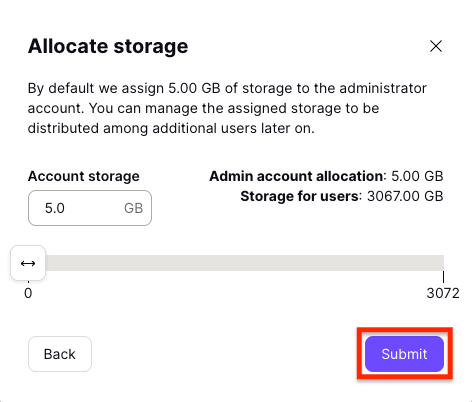
5. Allocate storage space to your administrator account. The amount of storage space you have available is determined by your plan.
Learn more about increasing your storage space
You can allocate your storage space among your organization’s users later. For now, you’re allocating storage space only for the administrator account. This storage will be used for the administrator’s email contents and for files stored on Proton Drive. Click Submit when you’re done.
Your organization is now activated. You should now see its name when you go to the Multi-user support section in your Proton Account Settings.
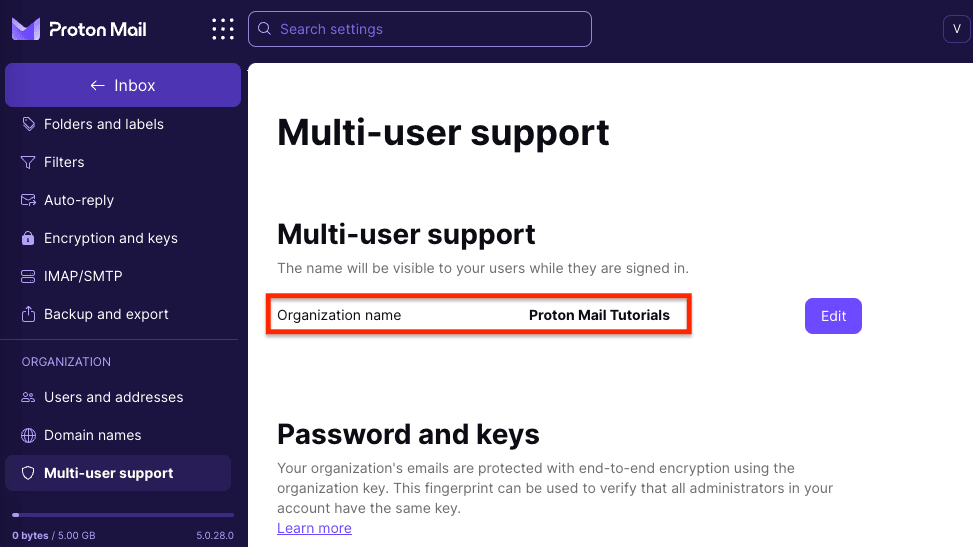
The next step is to add new users to your Proton Mail organization.
How to set up an organization in Proton Mail
Step 1: Set up your custom domain(s) (optional for Proton Visionary)
Step 2: Create your organization (you are here)
